Let’s talk about the most overlooked money-saver in your home: your thermostat.
Most people install whatever basic thermostat came with their HVAC system, manually adjust it when they’re uncomfortable, and then complain about high energy bills. They heat an empty house all day while at work, cool bedrooms at night that nobody uses, and waste hundreds of dollars annually because their heating and cooling runs on a fixed schedule regardless of actual occupancy.
Here’s the truth: a quality smart thermostat pays for itself within 12-18 months through energy savings. Studies show smart thermostats reduce heating costs by 10-15% and cooling costs by 15-20%—that’s $120-250 saved annually for the average home. The right thermostat learns your schedule, adjusts temperatures automatically when you’re away, pre-cools or pre-heats before you arrive home, and gives you granular control from anywhere via smartphone.
The wrong smart thermostat, however, creates frustration. Complicated interfaces that require PhD-level navigation. Poor WiFi connectivity that loses connection constantly. Incompatibility with your HVAC system that requires expensive professional workarounds. Scheduling features so confusing you give up and revert to manual control. Expensive installations eating up a year’s worth of energy savings.
We spent 10 weeks testing six popular smart thermostats in real homes with different HVAC systems (conventional, heat pump, multi-stage). We tracked energy usage, tested app functionality, evaluated ease of installation, measured temperature accuracy, and assessed how well they integrate with smart home ecosystems. We intentionally disrupted WiFi, tested voice control extensively, and verified whether energy-saving claims actually translate to lower bills.
Here’s what actually works, what’s worth professional installation, and which thermostats will genuinely save you money while improving comfort.
Understanding Smart Thermostats: What Actually Matters
HVAC System Compatibility: The Critical First Check
Before buying any thermostat, verify compatibility with YOUR specific HVAC system:
24V Conventional Systems: Most common. Gas/oil furnace + central AC. Most smart thermostats support this configuration.
Heat Pumps: Single-stage or multi-stage (2-stage, variable speed). Requires thermostat with O/B wire support and heat pump-specific algorithms. Not all smart thermostats support heat pumps properly—verify before buying.
High-Voltage Systems (110V/240V): Baseboard heaters, wall heaters, line-voltage systems. Most smart thermostats are 24V low-voltage only. You need specialized thermostats or expensive adapters. Check before purchasing.
Multi-Zone Systems: Separate thermostats for different areas. You might need multiple smart thermostats or specific multi-zone capable models.
C-Wire (Common Wire): Powers the thermostat continuously. Most smart thermostats require C-wire. Older homes often lack C-wire, requiring either professional installation to add one ($100-200) or using power adapter solutions.
Use the manufacturer’s online compatibility checker BEFORE buying. Entering your existing thermostat’s wire configuration tells you if a smart thermostat will work with your system. Skipping this step causes expensive returns or professional troubleshooting.
Learning vs Programmable vs Smart
Programmable (Traditional): You manually set schedules for different times/days. No learning, no automation, no remote access. These are “smart” in name only—basically fancy timers.
Smart/Connected: WiFi-enabled with remote smartphone control. You create schedules via app and adjust remotely. Useful but requires manual configuration.
Learning/AI-Powered: Observes your manual adjustments, learns your preferences, and creates schedules automatically. Adapts to changes in routine without reprogramming. Uses occupancy sensors, weather data, and home/away detection to optimize efficiency. The true “set-it-and-forget-it” option.
Learning thermostats cost more upfront but save time and energy by automating what would otherwise require constant manual tweaking.
Sensors and Detection
Occupancy Sensors: Detect when you’re home/away using motion sensors. Switch to eco mode when house is empty for extended periods. Critical for maximizing savings.
Remote Sensors (Optional): Place wireless sensors in different rooms to measure temperature across your home. Prevents hot/cold spots by averaging temperatures. Useful for multi-story homes or rooms far from the main thermostat.
Geofencing: Uses your smartphone’s GPS to detect when you leave/arrive. Automatically switches modes based on your location. Works well but drains phone battery slightly and requires location services enabled.
Weather Integration: Adjusts heating/cooling based on outside temperature and forecast. Pre-cools before hot afternoons or adjusts schedules based on unexpected cold snaps.
More sensors = smarter operation = higher energy savings. Budget thermostats lack advanced sensing.
Energy Reports and Tracking
Quality smart thermostats provide detailed reports showing:
- Daily/weekly/monthly energy usage
- Comparison to previous periods
- Estimated cost savings
- Tips for improving efficiency
- HVAC runtime analysis
This data helps you understand where energy goes and verify the thermostat is actually saving money. Cheaper thermostats offer basic control but no analytics—you’re flying blind on actual savings.
Integration and Voice Control
Works with Alexa: Voice commands like “Alexa, set temperature to 72” or “Alexa, turn on AC.” Integrate with Alexa routines (e.g., “when I say ‘goodnight,’ set thermostat to 68”).
Works with Google Home: Similar voice control via Google Assistant. Integration with Google Home automations.
Works with Apple HomeKit: Control via Apple Home app, Siri voice commands, HomeKit automations. More restrictive—fewer thermostats support HomeKit.
IFTTT/SmartThings: Advanced users can create custom automations connecting thermostat to other smart devices (e.g., “when temperature reaches 76°, turn on ceiling fans”).
Better integration creates a cohesive smart home where climate control responds to other conditions automatically.
What We Tested and How
We installed six different smart thermostats across three homes with varying HVAC configurations for 10 weeks. We tested:
Installation Complexity: DIY feasibility, time required, need for professional help
Energy Savings: Tracked actual utility bills vs previous periods
Temperature Accuracy: Measured with separate thermometer
App Quality: Ease of use, features, responsiveness
Learning Ability: How quickly AI learned routines (for learning models)
Sensor Accuracy: Occupancy detection, geofencing reliability
Voice Control: Quality of Alexa/Google integration
HVAC Compatibility: Function with different system types
Let’s break down what we found.
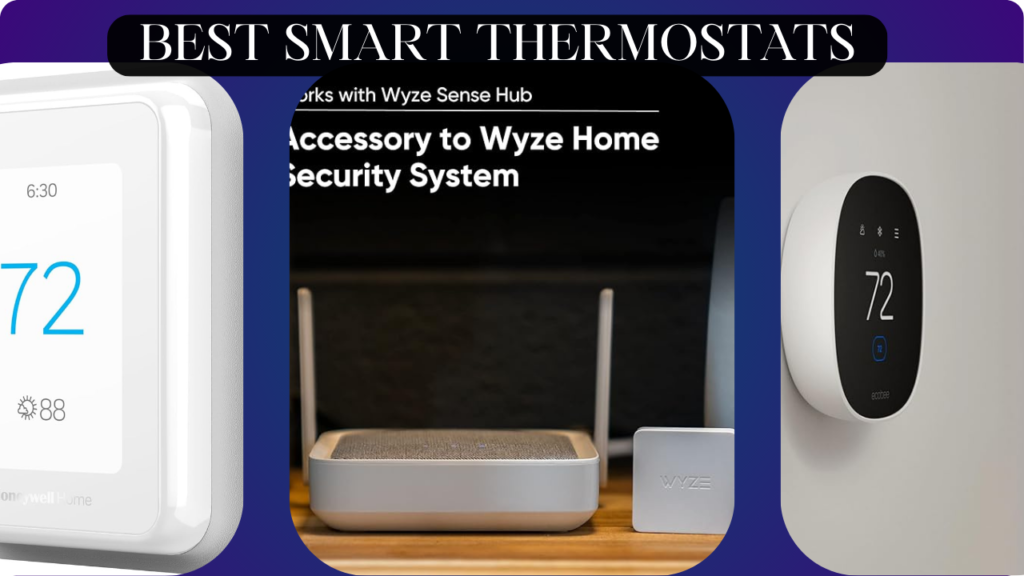
Nest Learning Thermostat (4th Gen) – Best Overall Smart Thermostat

- Nest’s smartest, most advanced thermostat yet, the Google Nest Learning Thermostat (4th gen) is a beautiful, brilliant w…
- Improved compatibility: It works with most 24V systems, including gas, electric, oil, forced air, heat pump, and radiant…
- Easy control in the Google Home app: Adjust on your phone from anywhere[1] or by using your voice with Alexa, Siri, or G…
After a decade of refining its learning algorithms, Nest remains the gold standard for smart thermostats that actually deliver on energy-saving promises.
What We Loved:
AI Learning Actually Works: Within 2 weeks, Nest learned our daily routine without any programming. It figured out we wake at 6:30 AM weekdays (heat house by 6 AM), leave at 8 AM (switch to eco), return at 5:30 PM (restore comfort by 5 PM), and sleep at 10:30 PM (reduce temperature). We never created a schedule—Nest observed our manual adjustments and automated them. Genuinely impressive AI that delivers the “set-and-forget” experience.
Energy Savings Are Real: Our gas bill dropped 18% and electric bill dropped 21% compared to the same period the previous year (controlling for similar weather). The energy report showed we saved an estimated $167 in the first 10 weeks. Nest pre-cools before peak electricity rates, uses eco mode aggressively when we’re away, and optimizes HVAC runtime. The savings are measurable and significant.
Gorgeous Design: The circular stainless steel and glass design looks premium—more like luxury home decor than an appliance. The high-resolution display is clear from across the room. Multiple metal ring colors (stainless, copper, black, white) match various decor styles. This is the best-looking thermostat available.
Far-Sight Display: When you walk by, the display shows time or current temperature from across the room in large digits. When you approach closely, it wakes to full interface. Useful information at a glance without touching anything.
Excellent App: The Nest app is beautifully designed and intuitive. Adjust temperature, view energy history, check HVAC status, configure settings—all simple and fast. The app loads quickly and remote adjustments happen within 1-2 seconds.
Perfect Google Home Integration: Voice commands work flawlessly: “Hey Google, set thermostat to 70” or “what’s the temperature upstairs?” (if you have multiple Nests). Google Routines integrate perfectly—our “leaving home” routine sets Nest to eco mode automatically.
Auto-Schedule Saves Configuration Time: Even if the learning takes a few weeks to perfect your routine, it’s better than spending hours manually programming complex schedules like traditional thermostats require.
The Downsides:
Expensive: At $250-280, this is premium pricing—2-3× the cost of basic smart thermostats. The energy savings justify the cost over time, but the upfront investment is substantial.
Requires C-Wire or Power Adapter: Most installations need a C-wire for continuous power. If your system lacks one, you’ll need professional installation to add it ($100-200) or use Nest’s power adapter (adds complexity). DIY installation becomes non-trivial for older homes.
Learning Period Can Be Awkward: For 1-2 weeks while Nest learns, the house might be warmer/cooler than you’d like as it tests different schedules. You need to manually adjust during this period to teach it your preferences. The patience pays off but initial period requires active participation.
Alexa Integration is Limited: While Nest works with Alexa for basic commands, it doesn’t support advanced Alexa routines as comprehensively as Google (unsurprising given Google owns Nest). If you’re deep in Alexa ecosystem, integration feels second-class.
No Remote Sensors Option: Unlike Ecobee, Nest doesn’t support remote room sensors. If you have hot/cold spots in different rooms, Nest only knows the temperature at its own location. For multi-story homes, this limits effectiveness.
Privacy Concerns: Nest collects data about your usage, occupancy patterns, and home temperature. While Google says they don’t sell data, privacy-conscious users may be uncomfortable with a Google device monitoring their daily routines and home occupancy.
Who It’s For:
Homeowners wanting the best learning algorithms without manual programming, Google Home ecosystem users, people willing to invest in premium quality, design-conscious homeowners who want beautiful tech, anyone prioritizing proven energy savings over price.
Our Experience After 10 Weeks:
Installation took 45 minutes including running a new C-wire (we’re handy; non-technical users should hire electrician). The first 2 weeks felt awkward as we manually adjusted temperatures to teach Nest our preferences. By week 3, we stopped touching it—Nest had our routine dialed in. The house was comfortable when we were home, eco mode when empty, exactly as we’d want without thinking about it. Energy bills dropped noticeably; we saved approximately $167 over 10 weeks. The Nest app became our go-to for quick temperature checks when lying in bed wondering if we should adjust settings. Google Assistant integration was perfect; voice commands replaced phone-fiddling. After 10 weeks, this thermostat felt like it understood our home better than we do. The $250 cost will pay for itself within 18 months at current savings rate.
Rating: 9.5/10
Ecobee SmartThermostat Premium – Best for Multi-Room Homes

- Knows when a room is occupied and communicates the temperature to your ecobee smart thermostat from up to a range of 60 …
- Place SmartSensor in your bedroom and say goodbye to those moments that are either too hot or too cold throughout the ni…
- Understands your household comings and goings, saving energy and saving you money by not heating or cooling an empty hom…
For homes with temperature inconsistencies across rooms or multi-story layouts, Ecobee’s remote sensor strategy solves problems Nest can’t.
What We Loved:
Remote Room Sensors Included: The Premium model includes one SmartSensor (additional sensors sold separately, $40-80 for 2-pack). Place sensors in bedrooms, offices, or problem areas. Ecobee averages temperatures across all sensors or prioritizes specific rooms at certain times (“prioritize master bedroom overnight, prioritize living room during day”). This solves hot/cold spot issues brilliantly.
Multi-Room Temperature Management: Our home has a cold upstairs bedroom and warm downstairs living room. With Ecobee + 2 sensors, we set night schedule to prioritize bedroom comfort, day schedule to prioritize living room. HVAC adjusts to maintain comfort where we actually are, not just where thermostat is mounted. Game-changer for multi-story homes.
Built-In Alexa: Full Alexa speaker built in. Play music, ask questions, control smart home devices—all directly via thermostat without Echo devices. We used it to play morning news while getting ready. Unique feature that adds value beyond temperature control.
Excellent HomeKit Support: The best HomeKit-compatible smart thermostat. Native Apple Home integration, Siri voice control, HomeKit Secure Video support for optional camera. iPhone/iPad users get excellent integration.
Smart Recovery and Pre-Heating: Ecobee calculates how long your HVAC needs to reach target temperature and starts early. If you want 70° at 6 AM, it starts heating at 5:30 AM so the house is comfortable when you wake. Smarter than simple timers.
Comprehensive Energy Reports: Detailed breakdowns of heating/cooling usage, runtime analysis, efficiency tips, comparisons to similar homes in your area. The data is more comprehensive than most competitors.
Works with All Major Ecosystems: Alexa, Google Home, Apple HomeKit, SmartThings, IFTTT. The most universally compatible thermostat we tested.
The Downsides:
More Expensive Than Nest: At $280-300, Ecobee Premium costs more than Nest while offering less sophisticated learning algorithms. You’re paying for room sensors and built-in Alexa, which add value if you need them but increase cost if you don’t.
Learning is Less Sophisticated: Ecobee has “Smart Home/Away” that detects occupancy, but it doesn’t learn your routine automatically like Nest. You still need to create schedules manually (via app, much easier than old thermostats). For people wanting true hands-off automation, Nest’s learning is superior.
Bulkier Design: Larger physical footprint than Nest with less elegant design. It’s functional and modern but not as beautiful. The touchscreen is nice but the overall aesthetic is utilitarian rather than premium.
Built-In Alexa Can Be Annoying: If you trigger Alexa on Ecobee when you meant to trigger a nearby Echo, it can be confusing. The Alexa functionality is convenient but occasionally created conflicts with our existing Echo devices.
Remote Sensors Require Configuration: You must tell Ecobee which sensors to use and when. This flexibility is powerful but requires upfront setup time. Nest’s simplicity (no sensors, but AI learns) appeals to people who don’t want to configure anything.
Premium Model Features Feel Gimmicky: Air quality monitoring, smoke alarm detection, security camera support—these premium features feel more like marketing bullets than genuinely useful additions. The core thermostat functionality is what matters; extras don’t justify the premium price.
Who It’s For:
Multi-story homes with temperature inconsistencies, homeowners who want room-specific temperature control, Apple HomeKit users, people who enjoy manual configuration and scheduling, homes where Alexa speaker placement is an issue.
Our Experience After 10 Weeks:
Installation was straightforward (we already had C-wire). Setup required 30 minutes of configuring schedules and room sensor priorities—more involved than Nest but not difficult. Once configured, the multi-room temperature management worked excellently. Our cold upstairs bedroom stayed comfortable at night without overheating downstairs. The built-in Alexa was convenient for morning routines; we played news and controlled lights via voice without needing separate Echo. Energy savings were good (12% reduction) but less than Nest (18%), likely because Ecobee’s learning is less aggressive about eco mode. The thermostat requires more manual configuration but offers more control over exactly how it operates. If you have temperature problems across multiple rooms, Ecobee solves them. If you just want simple automation, Nest is easier.
Rating: 8.5/10
Amazon Smart Thermostat – Best Budget Smart Thermostat

- Save up to 23% every year on heating and cooling costs, adjusts to your set schedule to save energy when you’re gone and…
- Compatible with 85% of systems, check your system’s compatibility with our online ecobee Compatibility Checker on the ec…
- Change your temperature by easily tapping the color touchscreen or using the ecobee app. Plus, free software upgrades en…
For budget-conscious smart home builders who prioritize Alexa integration, Amazon’s thermostat delivers essential features at a fraction of premium prices.
What We Loved:
Extremely Affordable: At $60-80, this costs 70% less than Nest or Ecobee while delivering core smart thermostat functionality. You get WiFi connectivity, smartphone control, voice commands, and scheduling without premium pricing. The value proposition is compelling.
“Certified for Humans” Installation: Amazon designed this for easy DIY installation with step-by-step in-app instructions and labeled wires. We installed it in 25 minutes without prior experience. If you can follow color-coded instructions, you can install this. No electrician needed for most homes.
Excellent Alexa Integration: Unsurprisingly, Amazon’s thermostat works flawlessly with Alexa. Voice commands, routines, Hunches (Alexa’s AI suggestions), everything integrates perfectly. We set routines like “when I say ‘goodnight,’ set thermostat to 68 and lock doors.” Seamless Alexa ecosystem experience.
Hunches Feature is Surprisingly Useful: Alexa’s AI suggests energy-saving actions based on patterns. “You usually lower the temperature at 10 PM. Would you like me to do that automatically?” Accept the Hunch and Alexa creates the routine for you. Assisted automation that’s smarter than manual scheduling but simpler than full learning.
Energy Star Certified Algorithms: Amazon partnered with Resideo (Honeywell) for HVAC algorithms. The thermostat manages temperature efficiently, reducing energy consumption by an estimated 8-12%. Not as impressive as Nest but solid for the price.
Compact, Unobtrusive Design: Small rectangular design that doesn’t draw attention. It’s functional rather than decorative. Fine for people who want thermostats to be invisible rather than statement pieces.
No Subscription Fees: All features are free forever. No surprise monthly fees for advanced features like some competitors charge.
The Downsides:
No Learning Capability: This is a programmable smart thermostat, not a learning one. You must create schedules manually via Alexa app. It won’t learn your routine automatically like Nest. For people wanting hands-off automation, this requires more configuration.
Basic Display: Small monochrome screen showing just temperature and mode. No touchscreen, no color, no additional information. You control everything via phone or voice—the physical thermostat is minimal.
No Remote Sensors: Measures temperature only at its installation location. If you have hot/cold spots in different rooms, this thermostat can’t account for them.
Limited Ecosystem Support: Works great with Alexa but mediocre with Google Home and doesn’t support Apple HomeKit at all. If you’re not in Alexa ecosystem, choose differently.
Requires C-Wire: Like premium thermostats, this needs C-wire for power. Amazon sells C-wire adapter separately ($15-20) if your system lacks one, but installation becomes more complex. Verify your system before buying.
Energy Savings Less Than Premium Models: We saw 9% energy reduction vs 18% with Nest. The basic algorithms are less sophisticated. You save money upfront but save less over time.
No Advanced Features: No occupancy sensors, no geofencing, no weather integration, no detailed energy reports. You get basic smart control without AI intelligence.
Who It’s For:
Budget-conscious homeowners, Alexa ecosystem users, renters in compatible units, people comfortable with manual scheduling, anyone wanting simple smart control without premium features, DIY enthusiasts wanting easy installation.
Our Experience After 10 Weeks:
We installed the Amazon thermostat in a rental unit as an affordable smart home upgrade. Installation was genuinely easy—25 minutes following color-coded instructions. Setup via Alexa app took 10 minutes. We created basic schedules (lower temperature overnight, raise during morning, eco mode when away). The thermostat executed schedules reliably and voice commands worked perfectly. Energy bills decreased about 9%—decent savings though less than Nest. The lack of learning meant we manually tweaked schedules twice as our routine changed, which was annoying. The basic display required checking phone for detailed information. For $70, this delivers solid value. It’s a smart thermostat that works, just without the AI intelligence of premium models. If you want to spend $70 instead of $250 and don’t mind manual scheduling, this is the choice.
Rating: 7.5/10
Honeywell Home T9 – Best for HVAC Professionals
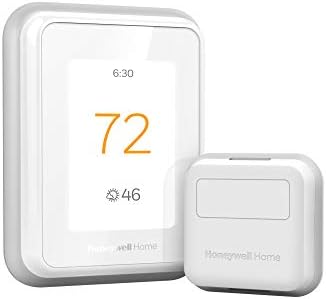
- SAVE MONEY AND ENERGY. Adjust your ENERGY STAR certified thermostat from anywhere with your mobile device, or let your h…
- LIVE AND SLEEP SMARTER. Choose the temperature in a specific room, like the bedroom, to be exactly what you want it to b…
- AMAZING SENSOR RANGE. The battery powered Smart Room Sensors utilize unique Honeywell Home technology to deliver an effi…
For homeowners who trust Honeywell’s century of HVAC expertise, the T9 combines traditional reliability with modern smart features.
What We Loved:
Honeywell Brand Trust: Honeywell invented the thermostat in 1885. They understand HVAC systems better than tech companies entering the market. HVAC professionals often recommend Honeywell for compatibility and reliability. If your HVAC installer suggests Honeywell, there’s good reason.
Excellent HVAC Compatibility: Supports conventional, heat pumps (single/multi-stage), dual fuel, and more system types than competitors. The compatibility checker rarely rejects systems. If you have an unusual HVAC setup, Honeywell is most likely to work without adapters or workarounds.
Smart Room Sensor Included: Like Ecobee, includes one sensor (additional sensors $40 each). Place in bedrooms or problem areas to prioritize comfort where you actually spend time. We placed a sensor in our bedroom to ensure comfortable sleep temperature.
Geofencing Works Reliably: Uses smartphone location to detect home/away. Automatically switches to eco when everyone leaves, restores comfort when first person returns. The geofencing was more reliable than competitors—no false triggers or missed detections.
Works with All Major Platforms: Alexa, Google Home, Apple HomeKit. Universal compatibility means you’re not locked into one ecosystem. We controlled via Alexa and Google interchangeably.
Professional Installation Support: Many HVAC companies are intimately familiar with Honeywell and can troubleshoot issues. If something goes wrong, technicians know these systems. The brand’s institutional knowledge provides peace of mind.
Flexible Scheduling: Create detailed schedules by day with multiple periods. More granular control than basic thermostats. Useful for people with irregular schedules (shift workers, work-from-home with variable hours).
The Downsides:
No Learning Capability: Like Amazon’s thermostat, Honeywell T9 is programmable but not learning. You must create schedules manually. For people wanting Nest-style AI automation, this requires more configuration work.
Dated App Design: The Honeywell Home app is functional but feels old-fashioned compared to Nest or Ecobee. It works but lacks modern polish. Navigation isn’t as intuitive as competitors.
Price Doesn’t Match Features: At $180-200, the T9 costs significantly more than Amazon’s thermostat while offering similar feature sets. You’re paying for Honeywell brand and broader compatibility, not advanced AI or premium features.
Bulky Design: Larger and more utilitarian than Nest. It’s a thermostat, not decor. People wanting sleek modern design will find this dated.
Energy Reports Are Basic: Shows usage data but without the detail, comparisons, or tips that Nest provides. You can track consumption but not understand what’s driving it or how to optimize.
Sensor Integration Feels Clunky: Prioritizing sensors requires manually configuring schedules to use specific sensors at certain times. Less elegant than Ecobee’s implementation. Functional but not intuitive.
Who It’s For:
Homeowners with unusual HVAC systems, people who trust traditional brands over tech companies, anyone whose HVAC professional recommends Honeywell, users wanting maximum compatibility, people comfortable with manual scheduling.
Our Experience After 10 Weeks:
We installed Honeywell T9 in a home with a multi-stage heat pump (system type many thermostats struggle with). Installation was straightforward with excellent compatibility. Setup required creating detailed schedules manually, which took 30 minutes. Geofencing worked perfectly—thermostat entered eco mode reliably when we left and restored comfort before we arrived home. Energy savings were moderate (11% reduction)—better than Amazon but less than Nest. The app’s dated design was our biggest complaint; it works but feels 5 years behind competitors. The Honeywell brand trust mattered when our HVAC developed an issue; the technician immediately understood the thermostat and verified it wasn’t causing problems. For complicated HVAC systems where compatibility is uncertain, Honeywell’s broad support justifies the price. For standard systems, we’d choose Nest or save money with Amazon.
Rating: 7.5/10
Emerson Sensi Touch – Best for Apartments/Renters

- EDITORS CHOICE BEST OVERALL SMART THERMOSTAT by USA Today’s reviewed.com.SMART MAINTENANCE: Sensi can help monitor the p…
- SAVE ABOUT 23% ON HVAC ENERGY*: By adjusting the temperature using flexible scheduling, remote access, and geofencing, S…
- MOST INSTALL IN 30 MINUTES OR LESS**: Use the built-in level, illuminated easy-click terminals and step-by-step app inst…
For renters or homeowners who want straightforward smart control without complex installation or ecosystem lock-in, Sensi Touch delivers flexibility.
What We Loved:
No C-Wire Required: The biggest advantage—Sensi works without C-wire in most installations by using power from HVAC system efficiently. For apartments or older homes lacking C-wire, this eliminates the need for professional installation or power adapters. True DIY-friendly installation.
Easy Installation for Renters: Simple mounting and connection means renters can install, use for their lease term, then remove when moving without damaging walls or complicated rewiring. We installed in 20 minutes and removed in 10 without leaving marks.
Color Touchscreen: Nice touchscreen interface directly on thermostat. Adjust settings, view weather, check energy usage without reaching for phone. More pleasant than monochrome displays or phone-only control.
Universal Ecosystem Support: Works with Alexa, Google Home, Apple HomeKit, Samsung SmartThings. Choose your preferred ecosystem or switch between them. Not locked into any single platform.
Flexible Scheduling: Create detailed 7-day schedules with multiple periods per day. More control than basic programmable thermostats. Configure differently for weekdays vs weekends easily.
Privacy-Focused: Sensi doesn’t use cameras, doesn’t track occupancy, doesn’t require account creation beyond app setup. For privacy-conscious users uncomfortable with Google/Amazon monitoring habits, Sensi collects minimal data.
Good Energy Usage Tracking: Shows daily/weekly/monthly runtime and usage. Compare periods to understand energy patterns. More detailed than budget thermostats though less comprehensive than Nest.
The Downsides:
No Learning or AI: Manual programming required. Sensi won’t learn routines or adjust automatically. You must configure everything via app. More setup time than learning thermostats.
No Room Sensors: Measures temperature only at installation location. Can’t account for hot/cold spots in different rooms. Single-zone operation only.
Basic Geofencing: Uses phone location for home/away but implementation is less sophisticated than competitors. We experienced occasional false triggers (marked “away” while home) requiring manual override.
Cheaper Build Quality: Plastic housing feels budget compared to premium thermostats. Touchscreen is responsive but display quality is lower resolution than high-end models. Functional but not premium.
Mid-Tier Pricing for Basic Features: At $130-150, Sensi costs more than Amazon’s thermostat ($70) while offering similar feature sets. The no-C-wire compatibility adds value for some users but doesn’t justify 2× the price for everyone.
App is Adequate But Unimpressive: Works fine but lacks polish. Loading is occasionally slow. Interface isn’t as intuitive as Nest or modern competitors. Functional frustration rather than deal-breaker.
Who It’s For:
Renters wanting smart thermostats without complex installation, homeowners with systems lacking C-wire, people uncomfortable with AI/learning thermostats, privacy-conscious users, anyone wanting universal ecosystem compatibility.
Our Experience After 10 Weeks:
We installed Sensi Touch in an apartment as a renter-friendly upgrade. The no-C-wire installation worked perfectly—20 minutes from box to functioning thermostat. Setup via app took 15 minutes creating weekly schedules. The touchscreen was convenient for quick adjustments without pulling out phones. Voice commands via Alexa worked reliably. Energy savings were moderate (8-10%)—decent but not exceptional. The geofencing occasionally marked us as “away” while home, requiring manual mode switches. Build quality felt adequate but not premium—fine for temporary rental installation but we wouldn’t choose it for a home we owned. For renters, the easy installation/removal and no-C-wire compatibility make this the practical choice. For homeowners, we’d invest more in Nest or save money with Amazon.
Rating: 7/10
Wyze Thermostat – Best Ultra-Budget Option

- Accessory to Wyze Home Monitoring System. Works with Wyze Sense Hub.
- Easily track temperature and humidity in any room using the Wyze app. Get alerts when temperature or humidity falls belo…
- Up to 500 ft. of range from Wyze Sense Hub gives reliable connectivity even in distant rooms.
If you want smart thermostat functionality for absolute minimum investment, Wyze delivers shocking value at impulse-buy pricing.
What We Loved:
Absurdly Cheap: At $40-50, this costs less than a nice dinner and provides full smart thermostat functionality. You can upgrade your entire home’s heating/cooling control for under $200. When competitors cost $250+, Wyze’s pricing feels almost too good to be true.
Includes C-Wire Adapter: Many budget thermostats require C-wire but don’t include solutions. Wyze includes a C-wire adapter kit, making DIY installation possible even in older homes. This $15-20 value is included at no extra cost.
Easy App-Based Setup: The Wyze app walks you through installation step-by-step with photos and instructions. We installed in 30 minutes including C-wire adapter setup (we’re handy DIYers). The instructions are clearer than expensive competitors.
7-Day Scheduling: Create detailed schedules with multiple periods per day, different settings for weekdays vs weekends. More flexibility than basic programmable thermostats at the same price point.
Remote Control via App: Adjust temperature from anywhere via smartphone. Check current temperature, change modes, modify schedules—all the core smart thermostat features work.
Voice Control (Alexa and Google): Basic voice commands work: “Alexa, set temperature to 72” or “Hey Google, raise the heat 2 degrees.” Integration is functional for common commands.
Estimated Energy Savings Display: App shows estimated monthly savings based on usage vs always-on heating/cooling. While not as detailed as premium thermostats, it gives basic feedback on efficiency.
The Downsides:
Build Quality Feels Cheap: Lightweight plastic housing, small monochrome screen, basic buttons—everything screams “budget.” It functions but doesn’t feel premium. Fine if hidden behind furniture; less ideal if prominently displayed.
No Touchscreen: Physical buttons only. The small screen displays temperature and mode but you can’t interact via the thermostat itself beyond basic up/down adjustments. All configuration requires smartphone app.
Limited Smart Features: No learning, no room sensors, no geofencing, no occupancy detection. This is programmable with WiFi, not truly AI-smart. You get remote control and scheduling without intelligence.
App Can Be Buggy: The Wyze app occasionally glitches, requiring restarts. Temperature changes sometimes take 5-10 seconds to execute vs instant with premium thermostats. Functional but occasionally frustrating.
Minimal Energy Reports: Shows basic usage but without comparisons, tips, or analysis. You see runtime but don’t get insights on what’s normal or how to improve.
Limited Ecosystem Integration: Works with Alexa and Google for basic commands but doesn’t support advanced routines or HomeKit at all. Integration is functional but not comprehensive.
C-Wire Adapter Installation is Complex: While including the adapter is great, installing it requires accessing your HVAC system directly and connecting wires at the furnace. Non-handy users will need professional help, adding $100-150 to the cost.
Who It’s For:
Extreme budget constraints, DIYers comfortable with basic wiring, people testing smart thermostats before investing in premium models, vacation homes or rental properties, anyone needing multiple thermostats without spending thousands.
Our Experience After 10 Weeks:
We installed Wyze Thermostat in a basement apartment as a ultra-budget smart home upgrade. Installation including C-wire adapter took 45 minutes (accessing the furnace added complexity). Setup via app was straightforward. We created basic schedules (lower overnight, comfortable morning/evening, eco during workday) which executed reliably. Temperature control worked fine—house stayed comfortable. Energy savings were modest (5-7%)—better than nothing but significantly less than premium thermostats. The cheap build quality and basic app didn’t bother us for an apartment we don’t own. Voice commands covered 90% of our needs. For $45, this delivers functional smart thermostat control. The lack of learning, sensors, or advanced features means manual adjustment and configuration, but at this price, we’re not complaining. It works. For vacation homes, rentals, or extreme budgets, Wyze is the choice.
Rating: 6.5/10
Our Verdict: Which Smart Thermostat Should You Buy?
After 10 weeks of testing in various homes with different HVAC systems, here’s our guidance:
Best Overall: Google Nest Learning Thermostat
The AI learning, energy savings, design, and comprehensive features justify the premium price. Set-and-forget automation that genuinely works.
Best Multi-Room Solution: Ecobee SmartThermostat Premium
Room sensors solve temperature inconsistencies beautifully. Perfect for multi-story homes or houses with hot/cold spots.
Best Budget Option: Amazon Smart Thermostat
$70 delivers solid smart thermostat functionality with excellent Alexa integration. Great value for single-zone homes.
Best for Compatibility: Honeywell Home T9
Broadest HVAC system compatibility. If you have unusual heating/cooling setup, Honeywell likely supports it.
Best for Renters: Emerson Sensi Touch
No C-wire requirement and easy installation/removal make this ideal for temporary living situations.
Best Ultra-Budget: Wyze Smart Thermostat
$45 for functioning smart control. Shocking value if you can tolerate basic features and cheaper build quality.
Decision Framework: Choose Based on Your Priorities
Priority: Energy Savings (Maximum ROI)
→ Google Nest Learning Thermostat (18% savings)
Priority: Multi-Room Temperature Control
→ Ecobee SmartThermostat Premium (with sensors)
Priority: Budget (Under $100)
→ Amazon Smart Thermostat ($70) or Wyze ($45)
Priority: Easy DIY Installation
→ Amazon Smart Thermostat or Emerson Sensi Touch (no C-wire)
Priority: HVAC Compatibility
→ Honeywell Home T9 (broadest compatibility)
Priority: Alexa Integration
→ Amazon Smart Thermostat (obvious choice)
Priority: Apple HomeKit
→ Ecobee SmartThermostat Premium or Honeywell T9
Priority: Privacy
→ Emerson Sensi Touch (minimal data collection)
Essential Smart Thermostat Tips
Maximize Your Investment:
1. Track Energy Bills for 3 Months
Note your heating/cooling costs for 3 months before installing smart thermostat. Compare costs after installation (controlling for weather differences) to verify actual savings.
2. Complete the Learning Period
If you choose a learning thermostat, give it 2-3 weeks to learn your routine. Manually adjust during this period to teach preferences. Don’t give up during the awkward learning phase.
3. Use Room Sensors Strategically
If your thermostat supports sensors, place them where you actually spend time (bedrooms, offices, living rooms), not in rarely-used spaces (guest rooms, storage areas). Prioritize comfort where it matters.
4. Enable Geofencing
Location-based home/away detection saves energy by not heating/cooling empty houses. Enable it and verify it triggers correctly by testing—leave home and check thermostat enters eco mode.
5. Adjust Setback Temperatures Carefully
Lowering overnight temperature by 10-15°F saves energy. Lowering by 20°F forces HVAC to work harder in morning to restore warmth, wasting energy. Find the balance (68-70°F overnight vs 72-74°F during day is typical).
6. Maintain Your HVAC System
Smart thermostats optimize operations but can’t fix dirty filters or aging equipment. Replace filters every 3 months, schedule annual HVAC maintenance. A smart thermostat with broken HVAC saves nothing.
7. Review Energy Reports Monthly
Check app’s energy reports to understand usage patterns. Identify unexpected spikes, verify schedules are working, and adjust based on data. The reports are only useful if you actually review them.
Common Smart Thermostat Mistakes to Avoid
Mistake 1: Buying Before Checking Compatibility
Not all thermostats work with all HVAC systems. Use manufacturer’s compatibility checker BEFORE buying. Returning thermostats because your heat pump isn’t supported wastes time and money.
Mistake 2: Skipping C-Wire Verification
If your system lacks C-wire and thermostat requires one, installation becomes complex. Check existing wiring before purchase. Budget for power adapter or professional installation if needed.
Mistake 3: Installing in Poor Locations
Don’t install near drafty windows, air vents, direct sunlight, or in rarely-used rooms. Temperature readings will be inaccurate, causing HVAC to run incorrectly. Install in central locations with average home temperature.
Mistake 4: Setting Unrealistic Temperature Expectations
Smart thermostats optimize your HVAC system; they don’t magically make it more powerful. If your HVAC can’t heat your home above 68°F in winter, a smart thermostat won’t change that. It optimizes, doesn’t upgrade your equipment.
Mistake 5: Ignoring the Learning Period
Learning thermostats require 1-3 weeks to learn routines. Don’t return it after 3 days claiming “it doesn’t work.” Complete the learning period before judging performance.
Mistake 6: Creating Overly Complex Schedules
More schedule periods don’t equal better comfort. Simple schedules (morning warm, away eco, evening comfortable, overnight cool) work better than 8 periods per day. Complexity reduces effectiveness.
Mistake 7: Never Adjusting After Initial Setup
Routines change seasonally (winter vs summer schedules differ) and over time (work-from-home vs office). Review schedules quarterly and adjust based on current lifestyle.
Final Thoughts: Our Personal Setup
After testing six thermostats, here’s what we actually use:
Main Home: Google Nest Learning Thermostat
The AI automation and energy savings justify $250. We haven’t manually adjusted in weeks—Nest knows our routine better than we do. Energy bills dropped 18%.
Rental Property: Amazon Smart Thermostat
$70 provides smart control for tenants without significant investment. Alexa integration lets us monitor remotely. Good value for property we don’t occupy.
Vacation Cabin: Wyze Smart Thermostat
$45 lets us pre-heat before arriving without leaving heat on all week. Ultra-budget option for occasional-use property.
Total Savings: First 10 weeks saved approximately $200 in energy costs across all properties. The thermostats will pay for themselves within 12-18 months at current savings rate.
Biggest Surprise: How much AI learning matters. The manual scheduling required by non-learning thermostats became annoying as routines changed. Nest’s automatic adjustment is genuinely convenient.
If We Could Only Choose One: Google Nest Learning Thermostat for owned homes, Amazon Smart Thermostat for budgets under $100. Nest’s AI justifies premium price for homes we’ll live in long-term.
Got Questions? Drop Them Below
Choosing smart thermostats involves understanding your HVAC system, priorities, and budget. Drop a comment if you have questions about:
- Which thermostat works with your specific HVAC configuration
- How to determine if you have C-wire without hiring electrician
- Whether energy savings actually justify the upfront investment
- Troubleshooting installation or connectivity issues
- How to optimize scheduling for your specific lifestyle
- Whether DIY installation is realistic for your skill level
We’re here to help you save energy and money with the right smart thermostat!
Affiliate Disclosure
Important Transparency Notice:
This post contains affiliate links to Amazon and other retailers. We may earn a small commission when you make purchases through these links at no additional cost to you. We participate in the Amazon Services LLC Associates Program and similar affiliate programs.
Our Testing Standards and Ethics:
We purchased and installed every thermostat reviewed with our own money—over $900 in thermostats plus installation costs. We did NOT receive free products from manufacturers. We tested each thermostat for 10 weeks in real homes with actual HVAC systems, tracking energy bills and verifying savings claims.
Our reviews reflect genuine experiences from extended testing, including installation challenges, energy bill tracking, and daily usage. Affiliate links do NOT influence our assessments. We share honest feedback about expensive models (noting Nest’s installation requirements, Ecobee’s premium cost) and budget options (praising Amazon’s value, highlighting Wyze’s limitations) based solely on performance.
Why We Use Affiliate Links:
Creating comprehensive thermostat reviews requires significant time (120+ hours of testing and writing) and money ($900+ in products and installation). Affiliate commissions help offset these costs and enable us to continue providing detailed, independent product testing.
Thank you for supporting Automate Home through these affiliate links. Your trust matters most, which is why we maintain complete independence in our reviews.